Saturday, May 31, 2014

Week-end tallies: Fourth week in review

This week was full of photography and photo cleanup, still preparing lots of things to be listed in the shop. Unfortunately, since I can only work when the baby is asleep, that filled my time for this week. Now that I have a good buffer of photos ready for new listings, though, I'm hoping to spend more time blogging next week - Enough to make two posts here, at least.
We'll talk about pieces that don't work and start-up costs then, if all goes according to plan.
After that, we'll talk a bit about advertising and "outposting," including a description of what that is!

As usual, here's some favorites from the shop this week:

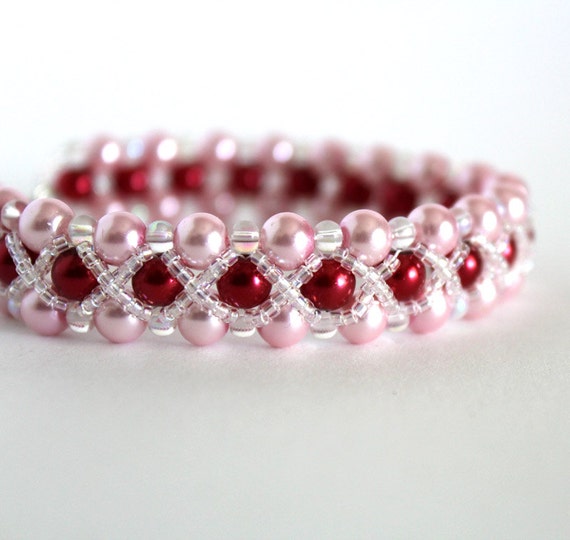
Hand woven hugs and kisses pearl bracelet, $20
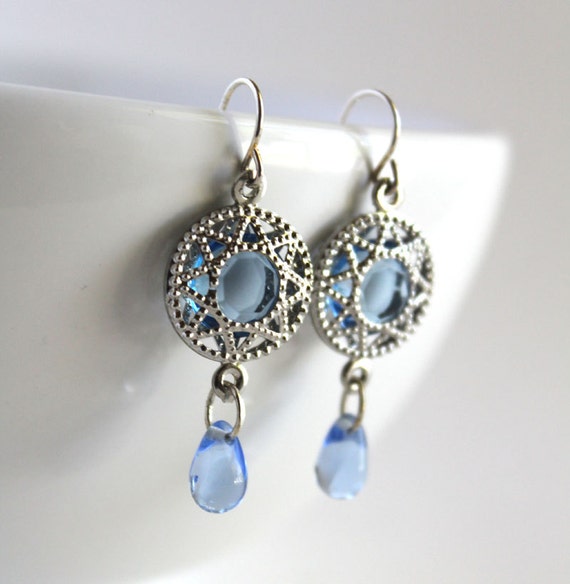
Blue sun filigree earrings, $9
In case you can't tell by now, I really love pearls and long, dangly earrings!

This week saw another big jump in value, and those expenses to list items are still creeping upward, but progress is progress, and once I have time to list everything, that'll certainly help the project along. There's already been a steady increase in the amount of traffic my shop sees, so it can only get better from there.

Total value of items made: $613.00
Total expenses to run business: $53.37
Total income: $40.00

Sunday, May 25, 2014

Price-saving packaging: Where to buy your supplies

Packaging items for sale and shipping can be intimidating. It can be a challenge, and it's easy for the prices to get out of hand. But don't worry. It doesn't need to be that way.

Something important to remember is that when you have something shipped, you don't pay for the cost of postage alone. There's a reason most places title the shipping cost shipping and handling. Whenever something is packaged and mailed, the cost of shipping is postage, and the cost of handling is the cost of packing materials plus the cost of time to package and prepare something for mailing. The latter two are something generally not offered for free, and if done right, the cost of packaging will be so minuscule that no one will bat an eye.

As an example, when I sell a pair of earrings, I charge $2.50 for shipping and handling. Postage alone on most packages comes out to $1.92 if I can ship from home, higher if it must go through the physical post office. A few cents cover the Etsy and Paypal fees charged on processing the cost of shipping, and the rest covers the expense of packaging.

Now, when I say packaging, I don't just mean the bubble mailer the stuff is shipped in. It also includes gift boxes, packing peanuts, bubble wrap, tissue paper, gift bags, or anything else that might be necessary for making a nice presentation. When you think about it, 50 cents to cover fancy packaging that leaves a lasting image of quality is pretty good. But when gift boxes at the store can cost upwards of a dollar each, how can you offer nice presentation without cutting into your bottom line?

Here's a few suggestions.

Tissue paper
Ideal for wrapping objects, keeping bundles of things together, and serving as a lightweight padding or filler. It comes in a lot of colors, too, which means you can coordinate it with a theme in your shop or other packaging.
Where to buy: PaperMart has some of the best prices I've found.
If you're in a hurry: Emergencies happen. If you need paper in a hurry, try a dollar store. Dollar Tree sells 50 sheets of white tissue paper for a dollar, making them a great last-minute resource.

Gift boxes
Though they come in a lot of shapes and sizes, my favorite is the pillow-style gift box. They're flat for storage, but fold up stiff enough to withstand mailing. Regardless of whether you want this kind or the traditional square boxes, though, the best supplier I've found is the same.
Where to buy: eBay. Stock changes all the time, so I won't provide listings, but eBay has the best gift box prices I've found, often available with free shipping.
If you're in a hurry: Make your own! A template like this one makes it easy to turn any piece of stiff paper or cardstock into a gift box at the last minute. If you're feeling ambitious, you can even use blank card stock and design a custom box to print for every item.

Ribbon, lace and twine
When you think of packaging, you might not immediately think of these things, but they make an excellent accent for trimming and finishing your product packaging. I tie all my gift boxes with a piece of satin ribbon in either my shop's colors, or colors coordinating with the item inside the package.
Where to buy: HomeSew has excellent prices on bulk trims.
If you're in a hurry: Of all places, Walmart actually has quality ribbons and trims at decent retail prices, if you're lucky enough to live near one with a fabric/sewing department.

Organza bags
Very popular for packaging small items without adding a lot of bulk or expense, though if you ship in bubble mailers, you'll need to add packing peanuts to the package to keep an item in an organza bag from being crushed.
Where to buy: While they do have a minimum order requirement of $25, it's definitely worth it to get these from 8seasons. Most come in packs of 100, for under $4 per pack. Just order a few hundred at a time and it works out great!
If you're in a hurry: Check the dollar bins at craft stores like Michaels or Hobby Lobby. They often have 4-packs of organza bags.

Bubble mailers
A staple for any small crafting business, you'll want to get these in bulk, as well. Most items fit into a #0, which is the right size for a DVD case to slide inside perfectly. A size #00 is a little more than half the size, but can be better for very small items.
Where to buy: eBay. Again, no links for this one because of changing stock, but you can usually find lots that work out to under 15 cents per mailer.
If you're in a hurry: Dollar stores are a good bet for last-minute bubble mailers, because while most stores sell them in bundles of 5 or more for at least 5 dollars, dollar stores tend to sell packs of two mailers for a dollar.

Cardboard shipping boxes
You may not realize it, but cardboard is actually pretty expensive. Boxes take unusual specialized machinery to make, glue and fold. I've actually gotten to see one of these machines in person before, and it's pretty impressive, and pretty expensive, too.
Where to buy: ULINE boxes in bulk work out to be the most cost effective. They sell a lot of other packing materials, too, so if you order them all at once, you can save on shipping.
If you're in a hurry: Make your own. Unwanted cardboard can be found at any major retail outlet. Ask for a few pieces and then get creative with a knife or scissors. I've often cut down pieces of cardboard to make boxes for shipping, and while it's time consuming, it's much better than paying several dollars a box anywhere you can pick them up in person.

There are other types of packaging I haven't covered, but since this post is already rather long, I'll leave it with the basics covered here and come back for more detailed information in another, later post.
Until next time!

Saturday, May 24, 2014

Week-end tallies: Third week in review

Once again, the week has gotten away from me before I had a chance to write much. Don't worry, there's still things coming - I have a few things ready for next week, including the promised discussion on remaking and repurposing old pieces, and also a special bit on packaging your products for shipping.

It isn't hard to add a little something special to your packaging to make it really pop. If you package things beautifully, too, your customers will enjoy that as an extra-special treat when they're unwrapping it! It's easy to do without breaking the bank, so I'll be sharing some secrets I've learned over the years.

The total value of items I have ready to list for sale has more than doubled this week, though not everything is up and listed just yet. I'll admit I cheated a little bit, most of the gain has come from sorting things out and finding a lot of great pieces I'd made up ages ago and never sold. I've listed six of them in the Etsy shop today, but here's a peek at my two favorites:

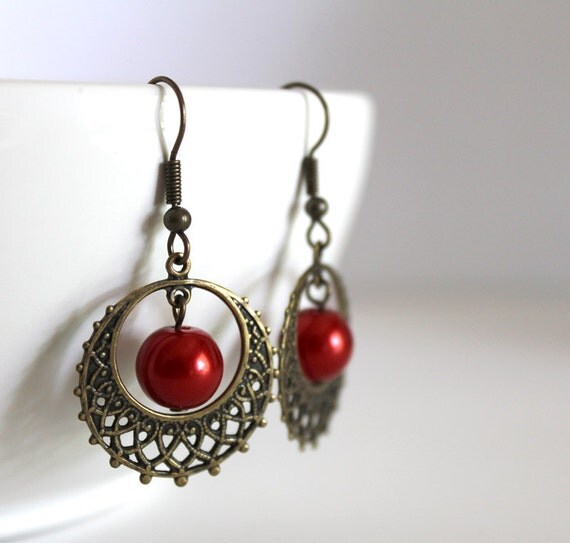
Red pearl and brass filigree earrings, $9

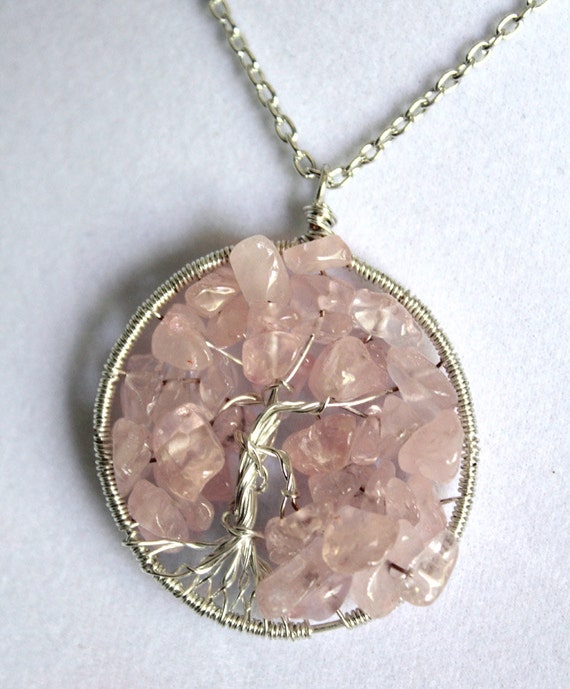
Rose quartz Tree of Life pendant, $25

That's a wrap for this week! We're creeping up on the point now where I'll break even on my start-up expenses.
Oh, that reminds me - Start-up expenses are something we'll be discussing soon, too!


Total value of items made: $471.00
Total expenses to run business: $51.77
Total income: $40.00

Friday, May 16, 2014

Week-end tallies: Second week in review

This was a hectic week for me, between Joe's birthday, Mother's day, Joe working half the weekend and us getting ready for a visit from my parents. Add in a baby who is working on cutting another tooth and two nights of insomnia for me, and it wasn't a very productive week at all!

I was able to dig a few things out of the mistake box to make a couple quick pieces, though, and I added a couple things to the project shop, so there's still a little forward momentum there.
I'll be blogging next week about the mistake box, so you can hear all about what it is and how I use it then.

For now, though, here's a pair of things that were new to the shop this week.

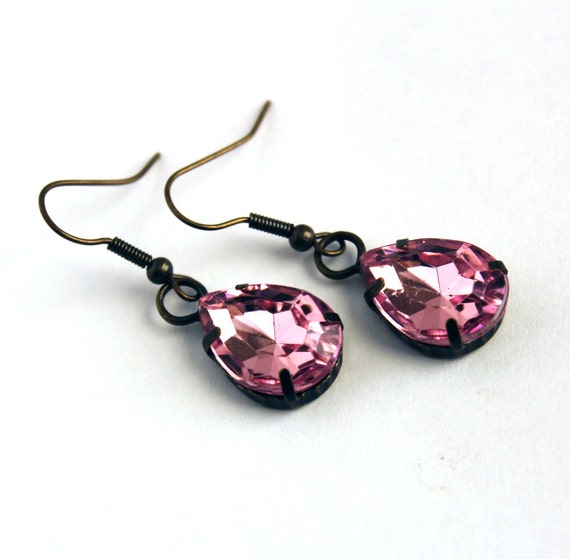
Pink acrylic crystal earrings, $5

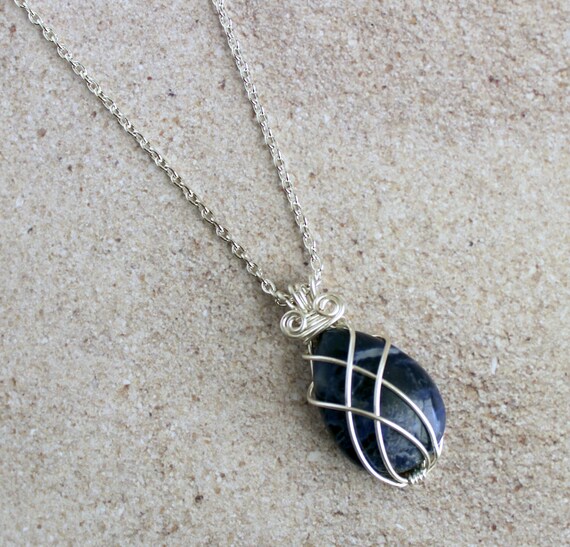
Wrapped sodalite pendant, $20
Deciding to part with the sodalite pendant was tough, actually. It was the very first wire-wrapped piece I ever made, and while I always intended to add it to something fancier and keep it for myself, I realized I've just fallen out of love with it. It isn't exactly what I hoped for, so it's time to move on. I have other cabochons to try again with in the future, and that's a venture I plan to share in the coming weeks, if I have time to get to it!

All in all, the tallies for this week are small. I spent 80 cents listing things in the shop, and the value of things added comes to $65. No sales this week, but since we were so busy, I had no time to promote the project. No surprise there. :)
Here's hoping next week is bigger and better!

Total value of items made: $211.00
Total expenses to run business: $49.87
Total income: $20.00

Monday, May 12, 2014

Finding your niche: Making your shop an audience-based business

There's a lot of buzz on the internet lately about audience-based business models. If you're not familiar with the term, I'll explain.

While there are many different models for businesses to follow, most can be summarized by being product-based or audience-based. A product-based business, as it may be obvious, begins with the product you've created, that you wish to market and sell. When you're first starting out, your shop will probably fall into this category. You don't have an audience yet, but don't worry! It's not hard to convert your business from product-based to audience-based. All you need is a little feedback to get you going.

With an audience-based business, you spend most of your time communicating with your fans and then catering to them. Is there one particular design or product that seems to sell better than all the rest? Something you consistently get more compliments on or receive positive feedback for? There's your niche!

So why convert to an audience-based business? You don't have to, but remember that word of mouth is the most powerful advertising tool there is. The more your audience loves what you create, the more likely they are to share your work--and your shop--with their family and friends, expanding your reach more than you may be able to do on your own.

Once you find which of your creations people seem most interested in, the transition from product-based to audience-based business is a piece of cake. All you do is make more items that are similar in style and type to what's already been successful, and expound on what your fans already like the most.

Freshwater Tahitian pearl bracelet
$16 in the project shop
Another way to expand into an audience-based business model is to cater directly to what your followers ask for. If you ask, they'll tell you exactly what they want! Maybe it's a handmade soap in a travel size. A specific color or size of jewelry.  For me, I have a lot of requests for freshwater pearl jewelry and wire-wrapped stones, so that's what I try to cater to first and foremost. Those products are consistently more successful than other designs, specifically because they're catering to what my audience has asked for.

What if you don't have an audience yet? How do you get the feedback you need?
Well, everyone has an audience! Do you have a Facebook account? Try showing your creations to family and friends there and ask which ones they like best. If one item receives a lot of attention, that can give you a great idea of which direction to grow.

And of course, if you really have no one to ask for feedback, I'm always willing to take a look!

Friday, May 9, 2014

Week-end tallies: First week in review

Well, the end of the week rolled around faster than I expected, and while I didn't meet all my goals for the week, I certainly made a lot of great progress toward getting the project going.

I've had a lot of people share the link for the Crafts to Riches project around the internet, so to those who are helping me get the word out, thank you so much! I'm still working on a list of topics to cover in coming weeks, so hopefully as the site continues to grow, there will be more information here for everyone to share.

There's a lot of new pieces up in the project shop, so I'll be updating the sidebar here with new favorites, but here's the two that seem to be most popular on Etsy:

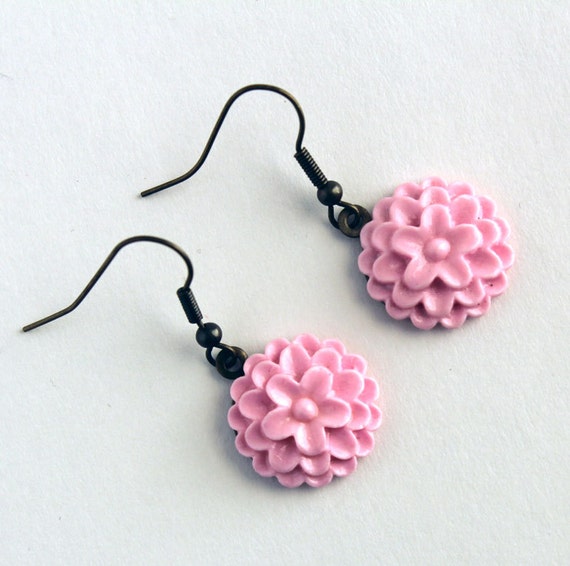
Pink Dahlia dangle earrings, $5

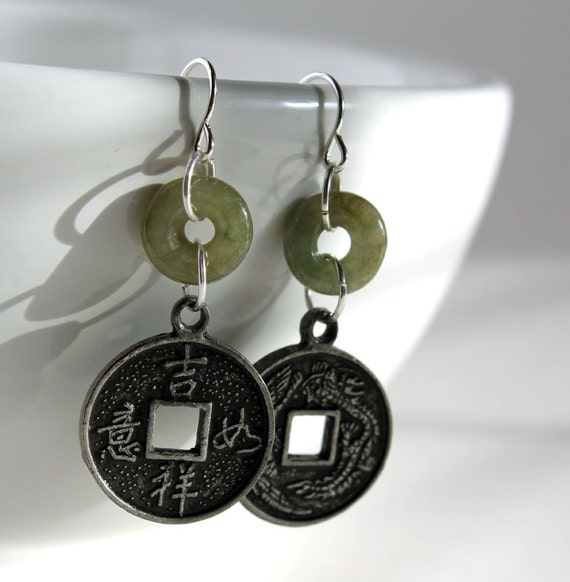
Lucky Chinese coin earrings - $9
Both have been featured in treasuries and have received a lot of positive feedback, so that's a great sign for a budding business! Just keep in mind that this can be you, a big part of why I'm doing this project is to illustrate exactly how you can reach a successful end result, too.

According to the numbers, I'm still behind overall, but seeing sales at all in the first week of a new venture on Etsy isn't just great, it's fantastic. That said, I hope next week continues to see steady forward momentum!

Total value of items made: $146.00
Total expenses to run business: $49.07
Total income: $20.00

Wednesday, May 7, 2014

Preparing your listings: Photographing products for Etsy

While I spoke a bit about photos when I wrote about listing things on Etsy in my other blog, I never really went into detail like I'm going to now. There's a million and one places you can find information about photographing things for your Etsy shops, but instead of just telling what to do, today, we're going to talk a little bit about why you should photograph things a certain way, and ways you can accomplish it without cutting into your bottom line.

Quality photographs are one of the biggest selling points for your products, but if you're not an art student like me, you may not have an idea how to make your product photos pop. Don't worry, it's not as hard as you think! There's really only 3 things to worry about:
  • Your photos need to be clear
  • Your photos need to be bright
  • Your photos need to be nicely staged

But as to what each of those things means, that's something we'll explore in a moment. First, I want to make something clear, because it's a concern I hear a lot.

You don't need to have a nice camera or expensive software to have nice product photos.
Seriously, it's more important to know what you're doing than to have a camera that costs $900. Of course, a fancy DSLR might help, but only if you know how to use it. One of my friends takes all her product photos with the camera on her iPhone, and her photos look great! As long as you have access to a camera and a few free tools, your results can be great.

Still my preferred camera for family outings
While I'm blessed to now have a Canon T3i for my photos and a copy of Photoshop my sister purchased, I had photos that were just as nice when I used the shabby little broken Pentax camera we mysteriously found in the bottom of a box after moving. Before I had access to the software I use now, I relied heavily on FotoFuze for cropping items out of photos and putting them on a white background. It's free and easy to use, and faster than cutting things out by using computer software and a mouse.

Aside from any camera and maybe access to FotoFuze, one other thing you'll need is a program that will allow you to adjust the brightness and contrast of your photos, crop and resize them before you take them into FotoFuze. Photoshop is the best tool there is for this, but if you didn't grow up with a graphic designer for an older brother and then luck out with a super-generous sister like I did, you can do just as well with GIMP. It's another excellent free resource, and getting better all the time.

Now that you've got a camera and editing software, let's move on to the next step, shall we?

Your photos need to be clear.
It might seem like a "duh" statement, but you'd be amazed at how many blurry photographs I see on Etsy. Never be that person. Retake a photo as many times as necessary to get a clear image. If you have shaky hands and don't have access to a tripod, try bracing your camera against a box or stack of books to keep the tremble at bay while photographing items. This will let you angle the camera and adjust as needed to get a good shot, but will drastically reduce the chance of ending up with a blurry photo.

If your photos always turn out blurry, keep in mind that it may be your setup causing things to go wrong. Setting up in the wrong lighting can cause a camera's sensors to go wonky, meaning most point-and-shoot basic cameras will automatically adjust exposure time and give you a blurry or grainy photo as a result. Natural daylight is always best for photos, but if you just can't work out a photo shoot by an open window, setting up right underneath a good lamp will do the trick, too. Using flash photography usually helps eliminate blur, but use flash only as a last resort, because it can cause ugly glare and cause colors to look all wrong.

Your photos need to be bright.
Proper lighting goes a long way to making a photo look good. Without any post-processing, which usually includes adjustment of the brightness, contrast and color saturation, a lot of photos tend to have an ashy gray cast to them. Upping the contrast and brightness in your editing software makes this a quick fix, but be mindful that it doesn't distort the color of the photo as well!
Colors should be clear, clean and crisp, and the background for most photos should be white, but we'll come back to that in the next section.

A product photo taken in an indoors light tent
Indirect daylight is always the best light source for photos. Indoor lighting gives things a yellow cast, and direct sunlight risks overexposure in your photos. It can take a few tries to get the lighting just right, so don't get frustrated if your photos aren't amazing on the first try. Even with several years of experience photographing my items, I still take between ten and twenty photos of each item and am lucky if I get five that are usable! Also remember that every photo will require editing, so what you see on the camera won't be the end result. Most white backgrounds in photos will look dingy yellow or gray until you correct the colors with a little quick editing.

A great solution for indoor photography is to build a light tent. While it sounds fancy and complicated, you can get similar results just by draping a white sheet where you can shine a lamp in through either side. If you're working with small items, you can find a great tutorial on building a cheap light box for product photography over here.

Your photos need to be nicely staged.
Sometimes, when you're staging your photos, you might not even realize you're doing it. For me, staging can mean something as simple as arranging a necklace chain into a swirl instead of letting it lay however it falls. Anything you can do to make your photos more visually pleasing is considered staging.

Every photo needs to be staged a little, even if most of your photography is happening on a white background. There's two reasons it should be happening on white, by the way. For one, you want most of your photos to be very clean and clear with minimal distraction. For another, having products on a white background will make it infinitely easier to crop them out for placement onto something else, like a collage, banner, or advertisement.

A little staging goes a long way when working against a white background. A great benefit to staging for photos against white is that you can include something to spice up a visually boring product. Items like soaps and candles usually aren't very exciting to look at, but you have the option of including something to represent the ingredients used or the fragrances offered. A candle can be staged with a flower or handful of berries beside it. A soap can be staged with an attractive (but not too fancy) soap dish or wash cloth.

A simple backdrop box
Advertisement is why a small number of your photos should still happen against a backdrop, possibly with more staging. One great way to make a backdrop is to use patterned scrapbooking paper, which can be purchased on sale for a few cents per sheet.

I created a simple backdrop stage for my products, using similarly-colored pieces of scrapbooking paper and the corner of a box. It cost less than sixty cents to put together, but the end result is great photos for advertising that take next to no effort!

Advertising photos can be used in a number of ways. These are the photos that make something look more tangible, the kind you might find in a catalog or brochure. These photos are more visually interesting because part of the idea is to create an attractive overall image that fits with a larger design scheme, as opposed to drawing attention specifically to a single item being portrayed. Generally speaking, though, your white-background photos should compose at least 75% of your product photography.

With those things in mind, now is a great time to start taking pictures of your products and getting your shop's lineup ready to go. That's what I'll be working on, this week!

A good example of simple product staging.